Create Like Button Using HTML, CSS and JavaScript
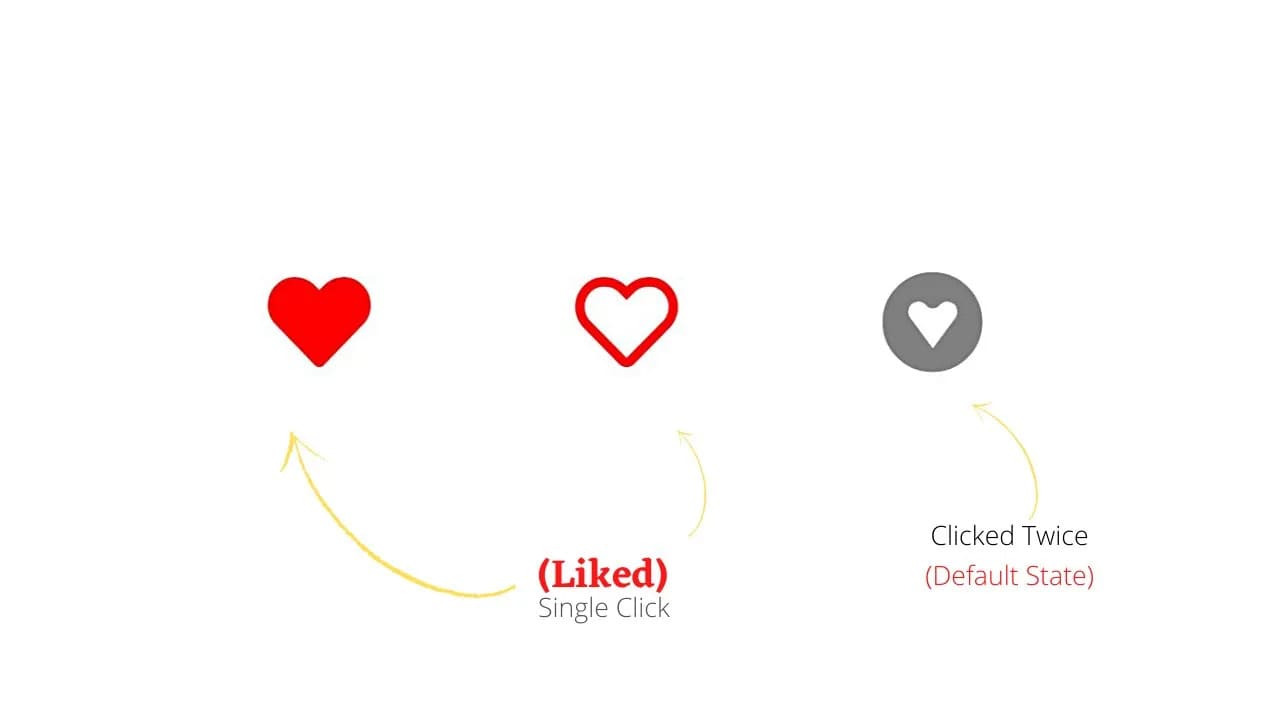
👋 Hi there, In this post you will learn to create Like button, which when clicked it becomes red and if clicked again its color become grey(default state)
JavaScript is used to add the click functionality to the buttons.
Checkout the source code provided below and you paste it in your HTML and CSS file to create these Like/Unlike button.
Watch Tutorial
HTML / JSX
<!DOCTYPE html>
<html lang="en">

<head>
    <meta charset="UTF-8">
    <meta http-equiv="X-UA-Compatible" content="IE=edge">
    <meta name="viewport" content="width=device-width, initial-scale=1.0">
    <title>Like Button</title>
    <link rel="stylesheet" href="style.css">

    <!-- Below  Url In src="" is Of Font Awesome Kit Create your own Kit and Use that Url below  Or also you can use Link of font Awesome Cdn if you don't want to create a kit and use older version of Font Awesome Icons     -->
    <script src="https://kit.fontawesome.com/f6dcf461c1.js" crossorigin="anonymous"></script>

</head>

<body>

    <div class="btns">
        <Button onclick="Toggle1()" id="btnh1" class="btn"><i class="fas fa-heart"></i></Button>
        <Button onclick="Toggle2()" id="btnh2" class="btn"><i class="far fa-heart"></i></Button>
        <Button onclick="Toggle3()" id="btnh3" class="btn"><i class="fab fa-gratipay"></i></Button>
    </div>
    <script>


    // First Like Button
       var btnvar1 = document.getElementById('btnh1');

       function Toggle1(){
                if (btnvar1.style.color =="red") {
                    btnvar1.style.color = "grey"
                }
                else{
                    btnvar1.style.color = "red"
                }
       }


    //    Second Like Button
       var btnvar2 = document.getElementById('btnh2');

       function Toggle2(){
                if (btnvar2.style.color =="red") {
                    btnvar2.style.color = "grey"
                }
                else{
                    btnvar2.style.color = "red"
                }
       }


    //    Third Like Button
       var btnvar3 = document.getElementById('btnh3');

       function Toggle3(){
                if (btnvar3.style.color =="red") {
                    btnvar3.style.color = "grey"
                }
                else{
                    btnvar3.style.color = "red"
                }
       }

    </script>


</body>

</html>
CSS Code
 *{
    margin: 0;
    padding: 0;
}

.btns{
    position: absolute;
    top: 216px;
    left: 328px;
    display: flex;
}

.btn{
    background: transparent;
    border: none;
    margin: 87px;
    font-size: 88px;
    outline: none;
    color: grey;
}

.btn i:hover{
    cursor: pointer;
}
